 Ferndale Siding
 Siding Installation in Lummi Nation: What the Climate Demands
Lummi Nation sits out on the peninsula west of Ferndale, close enough to open water that homes there deal with a heavier, more constant version of what the rest of Whatcom County only sees occasionally. Salt air moves in off Bellingham Bay and the Strait almost daily, rain arrives sideways as often as it falls straight down, and a long moss season keeps shaded walls and rooflines damp for most of the year. None of that is unusual for coastal Washington in general, but it hits harder and more consistently this close to the water.
A siding installation on a home in this location isn't just about picking a good product and nailing it to the wall. It's about a sequence of decisions, from the barrier underneath the cladding to the fastening schedule, that either accounts for that exposure or doesn't. This page covers what a correct installation looks like here, how our process works, and why a crew that already installs siding in this specific area brings something a general contractor from further inland usually doesn't.
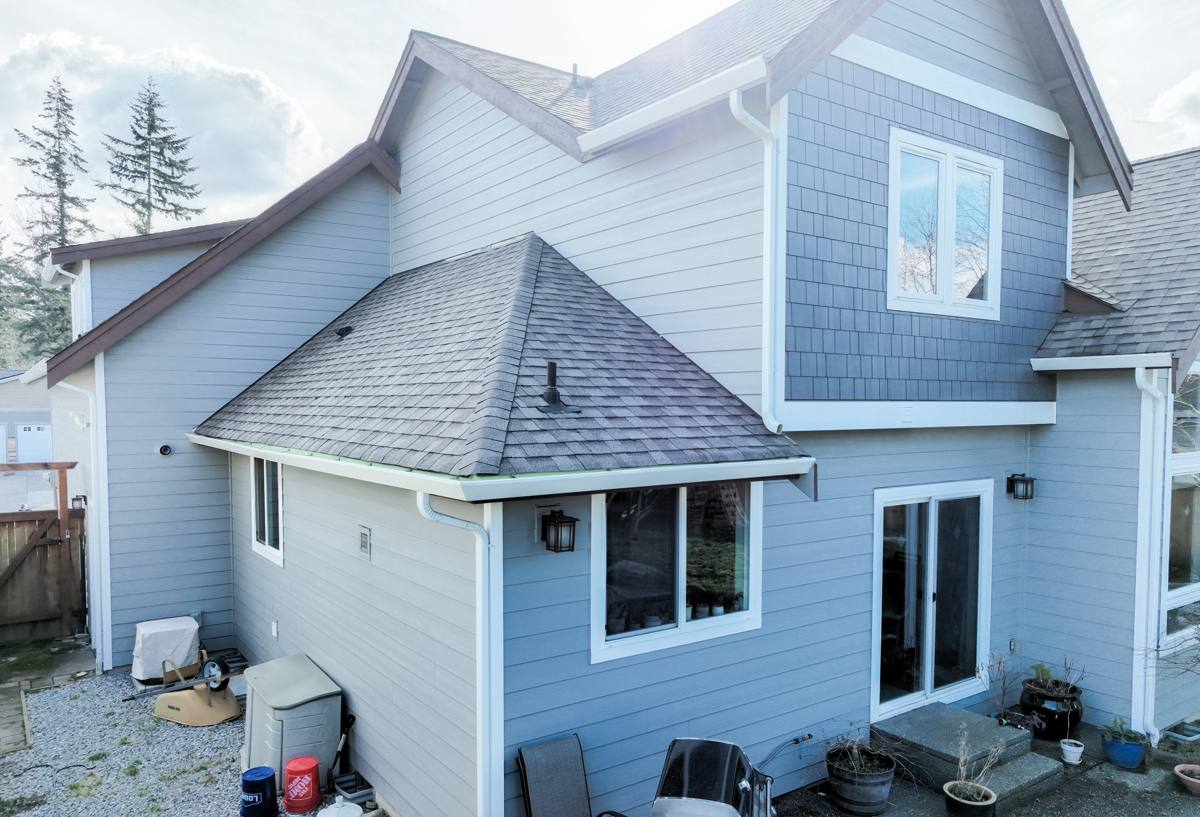
What This Exposure Requires From a New Siding System
Before any board goes up, the material and system have to be matched to the site. On a Lummi Nation home, that means planning for moisture load and wind that a standard inland install spec doesn't fully address.
- A weather-resistive barrier that actually drains — not just blocks bulk water, but gives any moisture that gets past the siding a way out instead of trapping it against the sheathing.
- Corrosion-resistant fasteners and flashing — salt air degrades lower-grade metal fasteners and trim noticeably faster than a drier inland site would.
- A climate-matched siding formulation — James Hardie's HZ5 line is engineered for regions with sustained moisture exposure and freeze-thaw cycling, which fits a near-waterfront Whatcom County property better than a standard formulation built for milder, drier climates.
- A tighter fastening schedule — exposed, less-sheltered lots take more direct wind, and fastening spacing that's adequate on a calm inland site can be marginal here.
Getting the system right on paper matters, but it only pays off if the installation itself follows through on every one of those details.
What a Correct Siding Installation Actually Involves
Most siding failures we get called out to inspect aren't material failures — they're installation shortcuts that didn't show up until a wet season or two had worked on them. On a Lummi Nation property, those shortcuts show up faster because the exposure is heavier. A correct installation follows a specific sequence, and skipping steps to save a day of labor is where most long-term problems start.
Tear-Off and Substrate Inspection
Old siding comes off down to the sheathing, and that sheathing gets inspected before anything new goes up. On homes near open water, it's common to find soft or water-stained sheathing behind old siding that looked fine from the outside. Installing new siding over compromised sheathing just buries the problem for the next owner or the next storm season to find.
Weather-Resistive Barrier and Flashing
A drainable house wrap goes on first, lapped correctly at every seam, with flashing integrated at windows, doors, and any penetration in the wall. This is the layer that actually protects the structure — the siding is the first line of defense, but the barrier underneath is what keeps a small leak from becoming a rot problem.
Layout and Fastening
Lap siding gets planned out before installation starts so that reveal lines stay consistent and seams land on studs, not in the middle of a bay. Fasteners go in at the manufacturer's specified pattern and depth — overdriven or underdriven nails are one of the more common causes of premature failure, and it's a detail that's easy to rush on a job priced too aggressively.
Trim, Corners, and Joints
Corner boards, trim, and butt joints get flashed or back-primed as specified, not just caulked and left. Caulk is a maintenance item, not a waterproofing system, and treating it as the latter is one of the most common corners cut in this trade.
Final Inspection and Cleanup
A completed install gets walked and checked against the manufacturer's installation guidelines before it's called finished — fastener patterns, clearances from grade and roofline, and caulking at joints that actually need it. Site cleanup, including nail and debris removal from the yard, is part of finishing the job, not an afterthought.
Why James Hardie Fits This Installation
We install James Hardie fiber cement exclusively, and on a peninsula property this call is easier to make than almost anywhere else in our service area. We don't install LP SmartSide, vinyl, Cemplank, Allura, primed spruce, or cedar — each has its place in the broader market, but none of them handle this level of sustained moisture and salt exposure as predictably as fiber cement does when it's installed to spec.
| Material | Behavior Under Salt Air and Driving Rain | Installation Sensitivity |
|---|---|---|
| James Hardie fiber cement | Doesn't absorb moisture into its core; factory ColorPlus finish resists salt and UV fade | Requires correct fastening and clearances, but the material itself is stable once installed to spec |
| Vinyl siding | Can warp or become brittle under sustained wind and temperature cycling near open water | Needs room to expand and contract; installed too tight, it buckles |
| LP SmartSide / engineered wood | Wood-strand core can swell or deteriorate if moisture reaches it through a coating breach | Cut edges and joints need careful sealing; any gap is a moisture entry point |
| Cedar | Absorbs and releases moisture with the seasons; needs regular refinishing in a wet climate | Correct back-priming and fastening are critical, and upkeep is ongoing |
The table above isn't a knock on any of these products in general — it's why, specifically on a site with this much sustained water and salt exposure, we standardized on one system we can install with full confidence rather than juggling several with different maintenance and moisture profiles.
Timing an Installation Around Local Weather
Siding installation on the Washington coast has to work around the weather, not just fit it in between rain events. Sheathing left exposed during a stretch of driving rain can take on moisture before the barrier and siding ever go on, which is why we watch the forecast and sequence tear-off, wrap, and siding closely together rather than leaving a wall open overnight through an unpredictable system. Drier stretches in late spring through early fall are generally the most forgiving windows for a full re-side, though we do work through the wetter months when a home's condition doesn't allow for waiting, adjusting sequencing and protection accordingly.
Moss and mildew growth is a maintenance issue after the siding is up, not usually an installation-day issue, but the same conditions that grow moss — shade, dampness, limited airflow — are worth noting during layout, since north-facing and heavily shaded elevations will need more attention over the life of the siding than sun-exposed walls will.
Why a Crew That Already Works Lummi Nation Matters
A crew that installs siding on this specific stretch of the county regularly has already worked out the details that matter here: which wall orientations stay wet longest and need extra flashing attention, how tight a fastening schedule this level of wind exposure actually calls for, and how to sequence a job around weather that changes faster near open water than it does a few miles inland. Homes on or near the Lummi Nation reservation can also sit under different permitting and land-use processes than the surrounding county, and a crew that's worked in the area before knows to confirm which jurisdiction applies before scheduling work, rather than finding out partway through a job. That's the kind of practical knowledge that doesn't show up on a spec sheet and generally only comes from doing the work here repeatedly.
What to Ask Before You Hire
- Do you carry a current Washington contractor license and liability insurance, and can you show proof?
- Have you installed siding specifically in or near Lummi Nation or comparable near-water Whatcom County locations?
- What weather-resistive barrier and flashing system do you use, and how do you handle window and door integration?
- What fastening pattern do you follow, and does it account for this site's wind exposure?
- Do you provide a written estimate and a clear installation timeline before work begins?
- How do you handle sheathing repair if it's discovered once old siding comes off?
Cost Factors for a Lummi Nation Installation
| Factor | What It Affects | Why It Matters Here |
|---|---|---|
| Tear-off vs. new construction | Labor scope and disposal | Tear-off often reveals sheathing damage common on older, exposed homes |
| Home size and wall complexity | Material and labor hours | More corners, dormers, and trim details add install time regardless of climate |
| Wind exposure and fastening spec | Fastener count and labor time | Less-sheltered peninsula lots often need tighter fastening patterns than inland sites |
| Site access | Equipment and staging time | Some peninsula properties have tighter access or steeper grades than typical Ferndale lots |
| Sheathing condition | Repair costs before new siding goes on | Long-term moisture behind old siding is more common near open water |
These factors mean two homes of similar size can have real differences in installation cost, which is why we walk the property and give a written number based on what we actually find rather than a flat per-square-foot rate.
Getting Started
If you're planning a siding installation on a home in or near Lummi Nation, we're glad to take a look and walk you through what your specific property needs given its exposure. Reach out using the form below to schedule a free, no-pressure estimate.